스프링 프레임워크에서 소스코드를 만들때 컨트롤러에서 아무런 기능을 수행하지 않고 오로지 JSP만을 띄워줘야 하는 경우가 있다. 이러한 경우 Controller클래스에 일일이 @RequestMapping이 선언된 메소드를 구현하여서 JSP를 띄우는 것이 아니라 단지 xml에 jsp의 경로에 대한 선언만으로 url과 jsp를 매핑시키는 방법이 있다. 이 방법을 적용해 보도록 하자
[src/WEB-INF/views/test.jsp]
      <html />


      <%@ taglib uri="http://java.sun.com/jsp/jstl/core" prefix="c" %>
<%@ page language="java" contentType="text/html; charset=UTF-8" pageEncoding="UTF-8"%>
<html>
<head>
       <meta http-equiv="Content-Type" content="text/html; charset=EUC-KR">
       <title>Home</title>
</head>
<body>
<h1>
</h1>
<P> JSP 페이지를 Controller가 아닌 XML에서 선언된 url매핑을 통해서 연결되도록 함.</P>
</body>
</html>
[web.xml]
      <html />


      <?xml version="1.0" encoding="UTF-8"?>
<web-app version="2.5" xmlns="http://java.sun.com/xml/ns/javaee"
       xmlns:xsi="http://www.w3.org/2001/XMLSchema-instance"
       xsi:schemaLocation="http://java.sun.com/xml/ns/javaee https://java.sun.com/xml/ns/javaee/web-app_2_5.xsd">
       <filter>
              <filter-name>setCharacterEncodingFilter</filter-name>
              <filter-class>org.apache.catalina.filters.SetCharacterEncodingFilter</filter-class>
              <init-param>
                     <param-name>encoding</param-name>
                     <param-value>UTF-8</param-value>
              </init-param>
              <async-supported>true</async-supported>
       </filter>
       <!-- The definition of the Root Spring Container shared by all Servlets
              and Filters -->
       <context-param>
              <param-name>contextConfigLocation</param-name>
              <param-value>classpath:config/*-context.xml</param-value>
       </context-param>
       <!-- Creates the Spring Container shared by all Servlets and Filters -->
       <listener>
              <listener-class>org.springframework.web.context.ContextLoaderListener</listener-class>
       </listener>
       <!-- Processes application requests -->
       <servlet>
              <servlet-name>appServlet</servlet-name>
              <servlet-class>org.springframework.web.servlet.DispatcherServlet</servlet-class>
              <init-param>
                     <param-name>contextConfigLocation</param-name>
                     <!-- <param-value>/WEB-INF/spring/appServlet/servlet-context.xml</param-value> -->
                     <param-value>classpath:web-context.xml</param-value>
              </init-param>
              <load-on-startup>1</load-on-startup>
       </servlet>
       <servlet-mapping>
              <servlet-name>appServlet</servlet-name>
              <url-pattern>/</url-pattern>
       </servlet-mapping>
</web-app>
[web-context.xml]
그리고 웹 관련된 빈설정에 mvc 네임스페이스를 추가하고 <mvc:view-controller> 태그와 <mvc:annotation-driven/> 태그를 추가한 후 화면이 나오는지 확인해 본다.
      <html />


      <?xml version="1.0" encoding="UTF-8"?>
<beans xmlns="http://www.springframework.org/schema/beans"
       xmlns:xsi="http://www.w3.org/2001/XMLSchema-instance"
       xmlns:context="http://www.springframework.org/schema/context"
       xmlns:mvc="http://www.springframework.org/schema/mvc"
       xsi:schemaLocation="http://www.springframework.org/schema/mvc http://www.springframework.org/schema/mvc/spring-mvc-4.3.xsd
              http://www.springframework.org/schema/beans https://www.springframework.org/schema/beans/spring-beans.xsd
              http://www.springframework.org/schema/context http://www.springframework.org/schema/context/spring-context-4.3.xsd">

       <mvc:annotation-driven conversion-service="conversionService" validator="userValidator"/>
       <mvc:view-controller path="/test" view-name="test" />


       <bean
              class="org.springframework.web.servlet.view.InternalResourceViewResolver">
              <property name="prefix" value="/WEB-INF/views/" />
              <property name="suffix" value=".jsp" />
       </bean>


       <bean id="conversionService"
              class="org.springframework.context.support.ConversionServiceFactoryBean">
              <property name="converters">
                     <set>
                           <bean
                                  class="com.copocalypse.www.converter.RoleToStringConverter" />
                           <bean
                                  class="com.copocalypse.www.converter.StringToRoleConverter" />
                     </set>
              </property>
       </bean>
       <context:component-scan base-package="com.copocalypse.www" />

</beans>
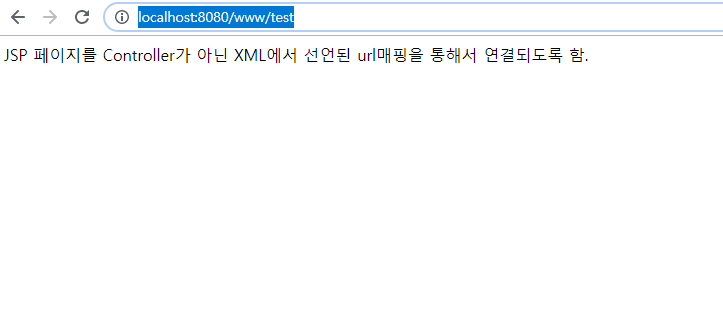
[결과]
정말 간단하다. 위의 두가지 태그만 사용하면 된다니 말이다. 단, 위의 두개 태그의 추가로 많은 설정값들을 없앴는데 이유는 <mvc:annotationc-driven/> 태그에 많은 설정이 포함되어 있어 중복되는 설정들이 있어서 오류가 발생하였기 때문이다. 그러나 실습을 진행해 오면서 모두 단위테스트를 통하여 테스트를 진행하였기에 Maven Test를 통하여 프로젝트 전반에 걸친 테스트를 통해 영향이 미치는 부분에 대한 버그들을 빠르게 고칠 수 있었다.

'IT > SpringFramework' 카테고리의 다른 글
| 스프링 <aop>네임스페이스를 이용한 AOP적용 실습 (0) | 2019.12.02 |
|---|---|
| 스프링 AOP 적용시 에러(MSG : nested exception is java.lang.NoClassDefFoundError: org/aspectj/weaver/reflect/ReflectionWorld$ReflectionWorldException) (1) | 2019.12.02 |
| 스프링 Validator를 이용한 서버내 유효성 검사 (0) | 2019.11.29 |
| SpringFramework ConversionService를 이용한 DataBinding (0) | 2019.11.28 |
| 스프링 컨트롤러 테스트(MockHttpServletRequest, MockHttpServletResponse) (0) | 2019.11.27 |